Showing posts with label Recipe. Show all posts

Friday, June 11, 2010

Hokkaido Chiffon

113_1377


114_1409

Hokkaido, my favourite place of all
with purely white snow covering the land in the winter
the snows are as soft as cotton
the view is amazingly pretty
it was the fall in love at first sight.


113_1343


114_1431

I miss my days in Hokkaido,
Danced in the snow,
Fooled around with the snowball fight
and i even had my "ice kacang" with the ice 'freshly' from the sky.

113_1340

When I came across this recipe, it brought me clear flash back on my trip.

DSC_1576

Hokkaido Chiffon - soft and fluffy chiffon. You will never forget its texture and taste; with lil' creamy custard filling in it.

DSC_1543

Hokkaido Chiffon cuppies
recipe adapted from 周老师的美食教室
(make 15)

Ingredients:
100g egg yolks
1/4 tsp of salt
40g sunflower seed oil
40g milk
vanilla essence
50g low protein flour
1/4 tsp of baking powder

210g egg whites
1/4 tsp cream of tartar
105g castor sugar

custard cream filling:
120g non dairy whipping cream
25g custard powder
75g cold milk


Procedures:
Preheat the oven at 170 degree.
Mix egg yolk with salt. Add in oil and milk and mix well.
Sieve flour and baking powder into the egg yolk mixture. Add in vanilla essence as well.
Whisk egg whites with cream of tartar until foamy and then ad in sugar and whisk until stiff.
Fold in half of the egg whites into the mixture and mix well. Then add in the other half and mix them evenly.
Fill the mixture into the cups
and Bake at 170 degree for 15 minutes. Leave cool.
Whip up the whipping cream.
Mix custard with cold milk and add into the whipped cream. Mix well.
Pump the custard cream into the chiffon.

You can either chill before serving or have it straight after filling in the cream :)

Note:
I use 4 AA size eggs for this recipe.
I omitted the vanilla essence from this recipe as i dislike the taste of vanilla.
I reduced the sugar to 85 grams as the whipping cream I used is sweetened

DSC_1565


DSC_1597

soft,
fluffy,
light,
and creamy :)

you will love it


Sunday, June 06, 2010

Okonomiyaki お好み焼

I love the dancing bonito flakes on top
I love the salty and sourish mayonnaise
I love the special sweet sauce
Okonomiyaki is something i fancy a lot.


DSC_1529

Bonito Flakes is dancing prettily on the hot pipping okonomiyaki.

I spotted this from a Taiwanese cooking TV show; the Taiwanese cook added in a lot of chopped scallion into it. Too much scallion for me and so I altered it to my own version :)

Simple, easy and healthy with lots of vege added.
You will love this if you love Takoyaki

Ingredients needed:
3/4 cup of low protein flour
1/2 cup of water
1 egg
cooked ham / bacon
Lots of cabbage
Chinese Chives (optional)
Carrot (optional)
Special Sweet Unagi Sauce / okonomiyaki sauce
Japanese Mayonnaise
Bonito Flakes


DSC_1076

Mix the flour with water until smooth.
Then added in chopped cabbage, sliced carrot, chopped Chinese chives and mix well.
Lightly stir fry the cooked ham.
add the cooked ham into the mixed vege-batter and mix well.
Crack an egg into the batter and lightly mix (do not make until very evenly)
and you can now pan-fry them in the non stick pan with little oil.
when the bottom surface turn into golden colour, flip it over to cook another side.

When it is cooked in the pan, serve on a plate.
top it with the Unagi sauce (or okonomiyaki sauce).
Finally, serve with mayo and garnish with Bonito flakes

DSC_1512

The one with sliced carrot in it.

DSC_1519

The one with Chinese chives in it

DSC_1084

Final touch up with Bonito flakes.

Tuesday, September 30, 2008

The soft & fluffy Pandan Chiffon Cake

This is a recipe given by my aunt. Mum and I experimented on it and did a lil’ change to this recipe. Well, it turns out to be superb after the changes. The Pandan Chiffon Cake is very ‘pandan-ry’ in flavour; the texture is extremely soft and fluffy.


Ingredients:


160g icing sugar
140g self raising flour
6 eggs (big size)
3 tbsp corn oil
2 ½ tbsp pandan juice
2 ½ tbsp fresh coconut milk
1/8 tsp cream of tartar


Firstly, sieve the self raising flour into a big mixing bowl.
Add in half portion of the sieved icing sugar into the mixing bowl as well.

Use the separate-egg method. Transfer the egg yolks into the big bowl and the egg whites are ready for high speed whisking.

Whisk egg whites with cream of tartar until foamy at a high speed. Then add in sugar and whisk until it stiff.

While the machine is doing its task, pour in the corn oil, pandan juice and fresh coconut milk into the big mixing bowl and start mixing.

As soon as the egg whites are ready, fold in half portion of the egg whites into the big mixing bowl and mix well. (For best result, I use the mixer to mix the soft mixture and egg whites in the mixing bowl. Lowest speed is used)

Fold the other half portion and mix well with spatula.

Pour the mixture into the chiffon mould. Send into the oven, bake at 175 °C for 40 minutes.

*Ding*

Allow the cake to cool and set before bringing it out from the mould.

Note that the Pandan juice I prepared, I plucked some fresh Pandan leaves, blended them into juice and store in the refrigerator for 1 night. The concentrated part will sediment and formed 2 layers. I removed the top watery layer for the natural greenish and a more flavourful result.


Here is my submission to Weekend Wokking created by Wandering Chopstick. This month’s host is Ivy from Precious Pea. The secret ingredient of the month is COCONUT. Or anything to do with coconut. Hence, I used the coconut milk in my recipe. Check out the round-up at her site this coming Wednesday to see the other submissions. If you are interested in participating, check out who's hosting next month.

Tuesday, February 26, 2008

My De-Stress Remedy

Shopping, eating and baking are always my de-stress remedy! Since my exam is drawing near and all my mid term tests ‘clump’ together in these few weeks, I really have no time to do some crazy shopping or dining out. What I could do at home --- BAKING!

Food is always part of my life and so do the desserts. As I promised to update pictures on the nice round cake in my previous post on Japanese Cottony Cheese Cake, here are some of the photos taken today and sorry for the delay…


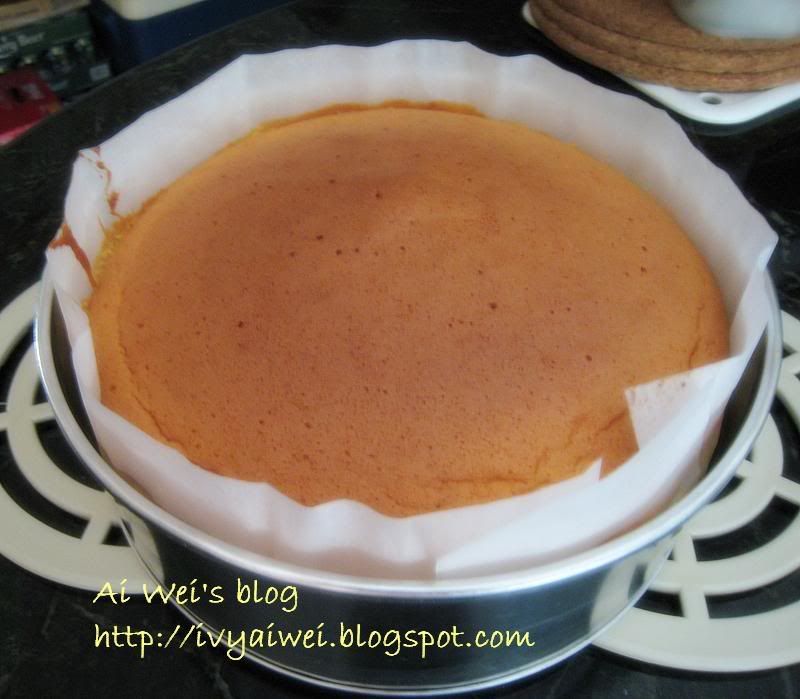
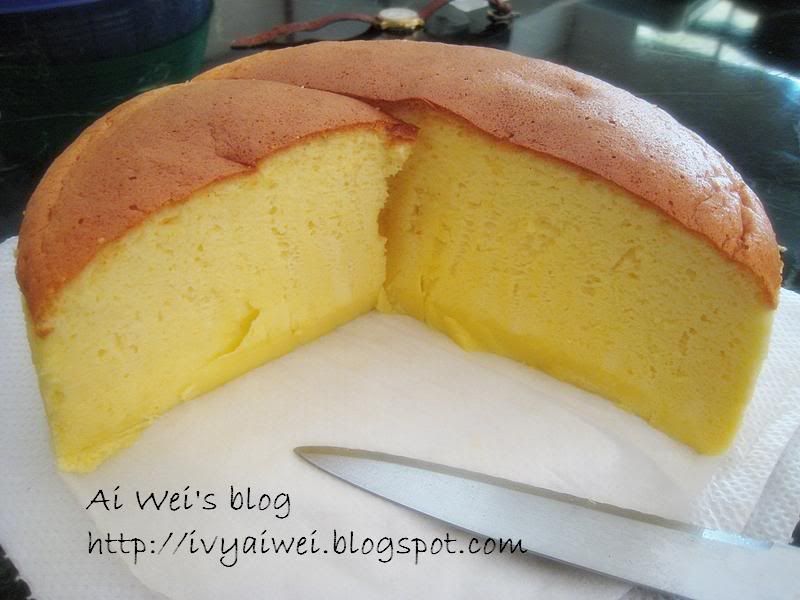
The Cottony Cheese Cake looks so good in the round pan. I was really happy with the round pan my mum bought. This cake was freshly baked in this evening and guess what?! We have wholloped half and left the remaining half for breakfast tomorrow!


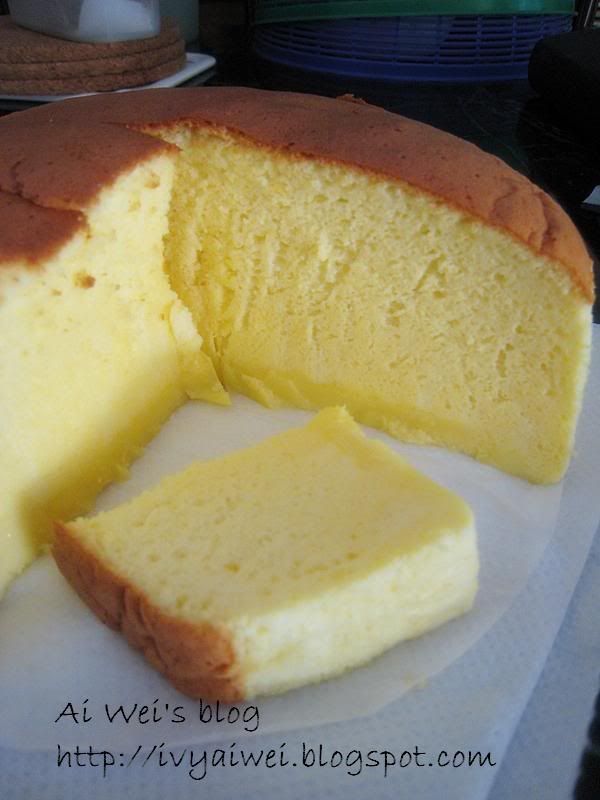
Due to the lack of lemon juice, I substituted it with 3 big table spoons of orange juice. It turned out soft, fluffy and tasty as well!


Each bite just melts right in your mouth!


For the cottony cheese cake lover, do try a hand on this adapted recipe (here). it is very easy to follow and bake ~

.

Monday, November 12, 2007

Japanese Cottony Cheese Cake

It’s my time to bake again.

The weather was cool and it rained for the whole Saturday morning. I was supposed to wake up at 7am and prepared all the ingredients for baking so I could have cakes for breakfast. Ended up, I was late for 3 hours. Still, I managed to have them as dessert after lunch!


I have been longing to bake this when I read through Precious Moments and Little Corner of Mine. The Japanese Cottony Cheese Cake looks so Yummy from 2 of the blogs. I did all alone in the beginning. Then second brother showed interest and gave me a helping hand while I was measuring the ingredients and separating the egg whites and yolks. He helped me out in mixing them. What a kind bro he is. (Ish… cannot praise him too much.)

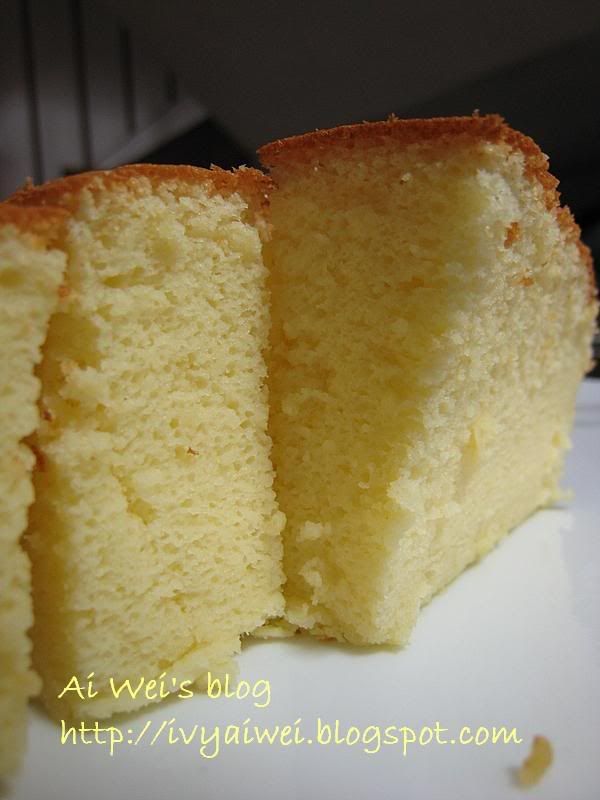
It was cottony, neither too sweet nor heavy and simply light. Maybe you will see that the texture is quite ‘rough’ from the slices but I can tell you, NO. They were soft and very fluffy. Just melt once in your mouth. I should have the cake sliced when it was really cool but I got a bit impatient and sliced the cake while it was still warm. A little imperfection is that I used a square pan instead of round pan. So, could not get a really nice pic of the square-shaped cake. I will get myself a round pan and post up the nice round cake picture soon. *coming soon*~

Besides, I brought 1/3 of the Japanese Cottony Cheese Cake over my aunt’s house and her kids simply love this. And yes, we finished the whole cake in just one day.

Point: Japanese Cottony Cheese Cake tastes good too after chilling.


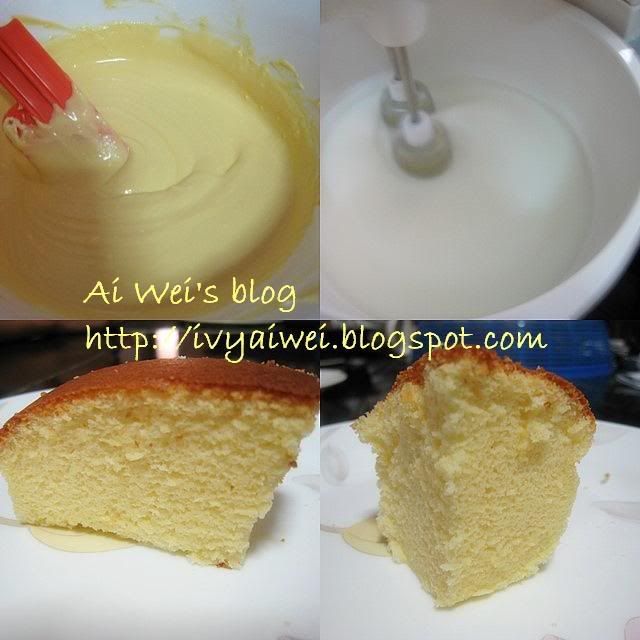
Upper left: after I mixed up both (A) and (B)
Upper right: mixture for (C)
Lower left and right: the fluffy cottony cake

The adapted recipe:

Part A:
250g Philadephia Cream Cheese
50g Butter
100ml Fresh Milk


Part B:
60g Superfine Flour (top or cake flor)
20g Cornflour
6 Egg Yolks
1 tbsp Lemon Juice
¼ tsp Salt


Part C:
6 Egg Whites
¼ tsp Cream of Tartar
140g Fine Granulated Sugar


Melt (A) in double boiler and cool the mixture until room temperature.

Fold in (B) and mix well

Whisk egg whites with cream of tartar until foamy and then add in sugar and whisk until soft peaks form. Fold in half of the (C) into the mixture and mix well. Then add in the other half and mix them evenly.

Pour the mixture in 8 inches round cake pan (lightly grease and line the bottom and side of the pan with greaseproof paper).

Finally, bake in water bath for 1 hour 10 minutes or until set or golden brown at 160 °C.


Try it out and enjoy~

Friday, September 28, 2007

Happy farewell

Farewell, my beloved physiology lecturer ms. Wong. Today is her last day in uni. She will be going to… (erm, I dunno cz I never ask for details *hehe*) A very strict person she is but sweet and nice too.

I was in the kitchen again, baking some crunchy little cookies for her.

Ingredients:


Butter, eggs (I want the yolks only), cookies mix, chocolate chips, almonds, pumpkin kernels (both almonds and pumpkin kernels baked before added into the batter), cornflakes.

Bake at 180 °C for 20mins.


*ding-ding* freshly baked crunchy cookies.


And, jar-ed them up in a container.


Thanks for the wonderful lectures, Ms. Wong. To thank her, I must pass all papers in flying coloursss! So, Must strive hard in studies!


P.S. ~ sorry, another short short super short post again. My mind is stuffed with facts and texts from the notes. Aaaahhhh! 3 tests fall on Tuesday, Wednesday, and Thursday respectively. *panic*

Tuesday, September 25, 2007

Caramelized Almond Crisp?!


I guess that’s the name for this? Mum and I were searching for almond crisp recipe for quite a long time. We love almond crisp a lot and we could only have it during Chinese New Year. Weird… almond crisp only on sale during CNY and the price is always a boom. My aunt who fancies this keeps bugging us to find out the recipe and make some for her.

So one day while mum and I were shopping in the cake ingredient shop, we saw the packets of icy white silky powder on the rack. BIENETTA (it stated in German). 200 g of bienetta + 300g of almond slice, line thin and bake. Looks simple. Hmmm, maybe that’s the almond crisp we were looking for?!

The end products~


Well, it was more like the Caramelized almond crisp than the almond crisps its own. Slightly sweet and crunchy, I like it. However, the bienetta (powder) is quite costly. Gonna take more efforts to find out the real recipe for almond crisp! ~

By the way, anyone knows what’s Bienetta?

Sunday, August 26, 2007

Homemade Chocolate Chips Walnut Muffin

It has been a long time since my last ‘baking’ because my house undergoes a little small tiny renovation which kept me busy in--- cleaning the house and doing household chores (which included vacuum, mopping, lap here and there….) I was really tired with it as I had the same routine (as above) for 2 weeks. *haih*

So, yesterday afternoon, I was in the kitchen without the assistant from mummy but the disturbance from my youngest brother. He wanted to help me by adding the ingredients. For me, he was really disturbing. Still, I managed to come out with 15 chocolate chips walnut muffins. *hehehe*


Ingredients like walnut, chocolate chips, muffin mix, corn oil, water, eggs are a must. (only parts of the ingredients shown as above)

Firstly, I baked the walnut and left it to be cooled. Meanwhile, I beat the eggs and added in the muffin mix and water little by little and stirred gently. Next, Corn oil was added and well mixed. You could add in chocolate chips and walnuts as many as you wish before sending them into the oven. Finally, placed about 4/5 full of the mixture into the cup moulds (with paper cups) and sent them into the oven. I baked them at 180 degree for 20minutes.

In the oven~

The chocolate chips walnut muffins, wanna have some?!


These are best served with coffee/ tea/ milk~

Friday, July 06, 2007

Blueberry Cheese Tart

I made it! I made it! I made it! Anyone wants?!

*Happy*

For the whole afternoon, I was experimenting and playing with this new recipe which I got from a Chinese newspaper. I have bought the ingredients in mid of last month and finally I have time for this new recipe. I have made about 12 pieces and the ingredients were cost less than Rm12 while out there selling Rm2 to 2.30 per piece.


Before removing the tarts from the mould.


I was a bit greedy. I have put a bit too much of the cream cheese mixture into each tart base. There seemed to have bit over filling. Next time I will reduce the filling for each and this means that I can make more tarts with the extra fillings.

I love this. It tasted so cheesy and the base and fillings were cooked just nice.

Recipe for blueberry cheese tart
Ingredients:


Tart base:
Flour 180g
Milk powder 15g
Castor sugar 30g
Butter 100g
Egg 1

Tart fillings A:
Cream cheese 250g
Castor sugar 60g
Butter 25g

Tart fillings B:
Lemon essence few drops
Blueberry filling sauce few

Steps:
1. Firstly, beat the tart base’s ingredients smoothly into dough.
2. Then separate them into small portions and place inside the moulds according to the shape of the moulds.
3. Next, use a fork to poke all over the base and send them into the oven. Bake at 150 °C for 10minutes.
4. beat the ingredients Tart fillings A into fluffy and smooth. Then add in a few drops of lemon essence.
5. Place the filling into each tart base at about 90% full. Add on a little Blueberry filling sauce. Use a toothpick to mix up the blueberry and the cream cheese. You may make some drawing as well.
6. Lastly, place the tart into the oven again and bake at 180 °C for 15minutes.

Wednesday, May 23, 2007

Cassava Raisin Cake

I was in the kitchen again with my mum to create this wonderful cassava raisin cake (木薯葡萄干蛋糕) this afternoon. That’s the recipe we got from the newspaper and so happened that my aunt brought us a huge cassava, a kind of tropical plant. This time I was going to be an assistant to weight the ingredients and preparing the oven and stuff. As we needed only 250grams of cassava paste, we used the left over cassava to make the pan-fried cassava (煎木薯糕). In the end, we have 2 dishes made from cassava. ^.^

The freshly bake cake


Look at the texture and the colour of the cake, soft and fluffy in the golden yellow. The cake smell great as there are huge amount of eggs inside.

pan-fried cassava

Recipe for cassava raisin cake (木薯葡萄干蛋糕)
Ingredients:
Butter 250g
Castor sugar 150g
Eggs 6
Cassava paste 250g
Self raising flour 200g
Raisin 60g
Steps:
Beat the butter and castor sugar until white and fluffy.
Eggs are added one by one into the mixture.
Add in cassava paste and lastly the self raising flour.
Mix them up evenly.
Raisins are added before sending them into the oven.
Then, bake at 170°C for 45minutes.

Margarine can be a substitute for butter if you dislike butter.
Related Posts Plugin for WordPress, Blogger...