Showing posts with label Baking. Show all posts

Monday, December 20, 2010

Soft Pumpkin Cake 松软南瓜蛋糕

I love to bake goodies that are simple, light and fluffy.
I love baked goodies that are made of natural ingredients; not with artificial flavouring or colouring. 
And this round, I chose to bake with pumpkin. Browsed through Table for 2 or... more and found this lovely recipe :P

From the photos, it was looking sooooo fluffy and soft

And mine... 


DSC_2874

Here!!! - The golden soft pumpkin cake

DSC_3116

I too, used this recipe and turned it into Swiss-rolls and added in pumpkin puree and whipping cream as the filling. It turned out prettily in golden orangey colour that one couldn't resist!

DSC_3129

Best for perfect afternoon tea

Love it? Have a try :)

Tuesday, March 02, 2010

Yogurt Sponge Cup Cakes

It's Party Time and i must say, this is best as the party's desserts!!!


IMG_3862

Yogurt Sponge Cup Cake

This is a very easy recipe that i came across from Sonia's blog (Nasi Lemak Lover). It is very simple, easy and takes you less than an hour to do the things. The best thing is - The yogurt Sponge cake is extremely spongy, moist and fluffy!!! besides that, it is very light and soft, not oily and not overly sweet.


IMG_3837

During this CNY, i baked 3 batches for family and friends. glad that they had nothing to complain about this :)

I love this recipe very much. After baking, the cake did shrink a little but it won't collapse. It remained where it used to be.

IMG_3858

I too decorated them with chocolate ganache and peach cuts (to attract the little cousin :P).

IMG_3870-1

Fancy some spongy and moist texture of sponge cake???
Do have a try and i bet you will love it.


Yogurt Sponge Cup Cakes (make 16 to 18 cups)
(Recipe credits to Sonia)

Ingredients

A)
4 medium egg yolks
10g castor sugar

B)
4 medium egg whites
60g castor sugar
1/4 tsp cream of tartar

C)
120g natural flavour yogurt
70g superfine flour
10g corn flour
40g corn oil


Steps:

1) Beat egg yolks and sugar until thicken and appears in pale yellowish colour. Add in yogurt and mix well. add in corn oil and mix it well with the batter.
2) Add in the sieved dry ingredients (flour) into the batter and mix well.
3) Beat the egg white and cream of tartar until foamy. Gradually add in sugar and continue to beat the egg white until fluffy and soft peak form.
4) Mix the 1/3 of the egg whites mixture into the egg yolk batter. finally add in the remaining egg white mixture into the batter and mix it evenly with a spatula.
5) Spoon the batter into the pretty cups.
6) finally, bake the cup cakes in pre-heated oven at 160c for 25 minutes.

Thanks to Sonia for this Yummy recipe!

You may love to view Bitter Sweet Flavour too for her round yogurt sponge cake decoration :)


Friday, February 12, 2010

Gong Xi Fai Cai & Happy V day!

It is CNY lor!!!

As usual, I will be helping mum in the kitchen, baking our own home-baked CNY cookies for family and friends. And this round, I put on efforts to bake pineapple tarts.

We dislike pineapple jam that selling in packs, hence, we bought fresh pineapples and made our own fresh pineapple jam. Mum used up 2 hours ++ to do the Jam and refrigerated them. I then continued with the baking part using the pre-mixed pineapple cookies Mix (i know i am lazy...).


IMG_3718

In the end, here are some of the Pineapple Tarts I managed :)
They aren't too pretty but we love the fragrant buttery pastry and the juicy with a lil sourish homemade pineapple jam.

IMG_3713

Here are some Pineapple Tarts recipe for try-outs:
Lingzie
Food 4 Thots
Almost Bourdain
My Kitchen Snippets


and it's so rare that this year, CNY meets V-day!!!

Wishing all of you,

HAPPY CHINESE NEW YEAR
GONG XI FA CAI
HAPPY VALENTINE'S DAY too
Happy Holiday and Have a Blast!~

Muacksss!~

Wednesday, February 10, 2010

Tinkie&i

It was one of my best-ies, ting's Birthday last week

I 'wisely' spent some of my brain cells to plan something for her, specially.
I 'quietly' arranged myself to be at the mid of her party (thanks to AT for helps and arrangement).
I specially bake her something for her special big day.


IMG_3669

This is the one --- Tinkie&i
And I have TM-ed it with Tinkie&i.

IMG_3658

On the pre-birthday party, i baked too as well as experiment on Tinkie&i.
It tasted good, creamy and velvety but I still have to work hard to improve it. ><


DSC01726

Happy Birthday to ting, and welcome to Club-24 :P


Wednesday, October 28, 2009

Peach Yogurt Baked Cheese Cake

When the baking mood comes, I will disappear myself into kitchen and appear myself in the living room after some hours. *just like playing the Apparition and Disapparition spells from Harry Potter.*

Last Friday, the baking mood dropped by. I got stimulated and disappeared into the kitchen again. With the help of the little elves (the handy little machines), I baked the Peach Yogurt Baked Cheese Cake. :)


IMG_2222

The Peach Yogurt Baked Cheese Cake is baked into golden Yellowish.


IMG_2221-1


IMG_2252

The Velvety cheese part is extremely silky smooth and soft. It melts between the hard palate and tongue. Simply irresistible + Cheesilicious!


IMG_2241-2


We finished the last piece on Sunday.
The family complained… Not Enough peaches. I should have line-d in more. Gotta put in more peach slices next time

:)

Tuesday, September 30, 2008

The soft & fluffy Pandan Chiffon Cake

This is a recipe given by my aunt. Mum and I experimented on it and did a lil’ change to this recipe. Well, it turns out to be superb after the changes. The Pandan Chiffon Cake is very ‘pandan-ry’ in flavour; the texture is extremely soft and fluffy.


Ingredients:


160g icing sugar
140g self raising flour
6 eggs (big size)
3 tbsp corn oil
2 ½ tbsp pandan juice
2 ½ tbsp fresh coconut milk
1/8 tsp cream of tartar


Firstly, sieve the self raising flour into a big mixing bowl.
Add in half portion of the sieved icing sugar into the mixing bowl as well.

Use the separate-egg method. Transfer the egg yolks into the big bowl and the egg whites are ready for high speed whisking.

Whisk egg whites with cream of tartar until foamy at a high speed. Then add in sugar and whisk until it stiff.

While the machine is doing its task, pour in the corn oil, pandan juice and fresh coconut milk into the big mixing bowl and start mixing.

As soon as the egg whites are ready, fold in half portion of the egg whites into the big mixing bowl and mix well. (For best result, I use the mixer to mix the soft mixture and egg whites in the mixing bowl. Lowest speed is used)

Fold the other half portion and mix well with spatula.

Pour the mixture into the chiffon mould. Send into the oven, bake at 175 °C for 40 minutes.

*Ding*

Allow the cake to cool and set before bringing it out from the mould.

Note that the Pandan juice I prepared, I plucked some fresh Pandan leaves, blended them into juice and store in the refrigerator for 1 night. The concentrated part will sediment and formed 2 layers. I removed the top watery layer for the natural greenish and a more flavourful result.


Here is my submission to Weekend Wokking created by Wandering Chopstick. This month’s host is Ivy from Precious Pea. The secret ingredient of the month is COCONUT. Or anything to do with coconut. Hence, I used the coconut milk in my recipe. Check out the round-up at her site this coming Wednesday to see the other submissions. If you are interested in participating, check out who's hosting next month.

Tuesday, February 26, 2008

My De-Stress Remedy

Shopping, eating and baking are always my de-stress remedy! Since my exam is drawing near and all my mid term tests ‘clump’ together in these few weeks, I really have no time to do some crazy shopping or dining out. What I could do at home --- BAKING!

Food is always part of my life and so do the desserts. As I promised to update pictures on the nice round cake in my previous post on Japanese Cottony Cheese Cake, here are some of the photos taken today and sorry for the delay…


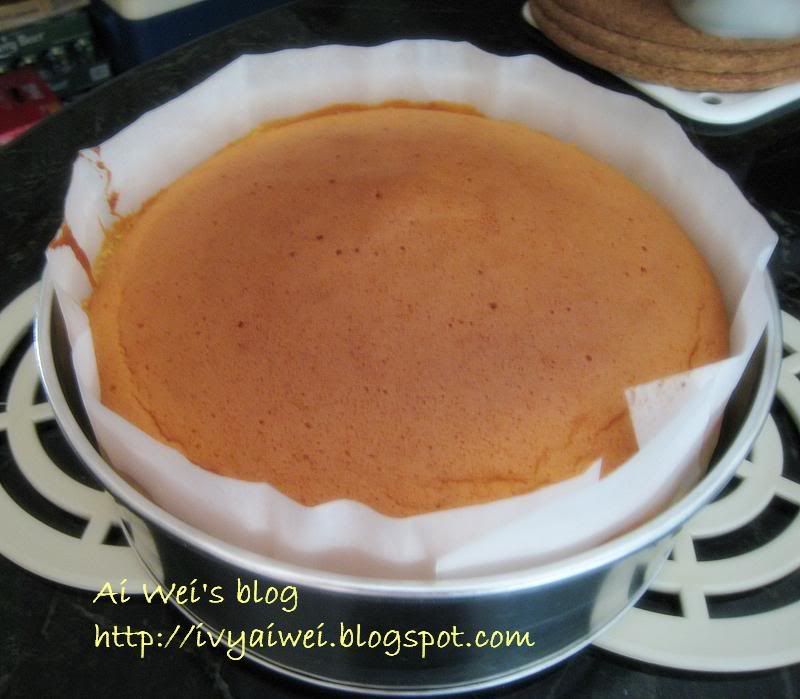
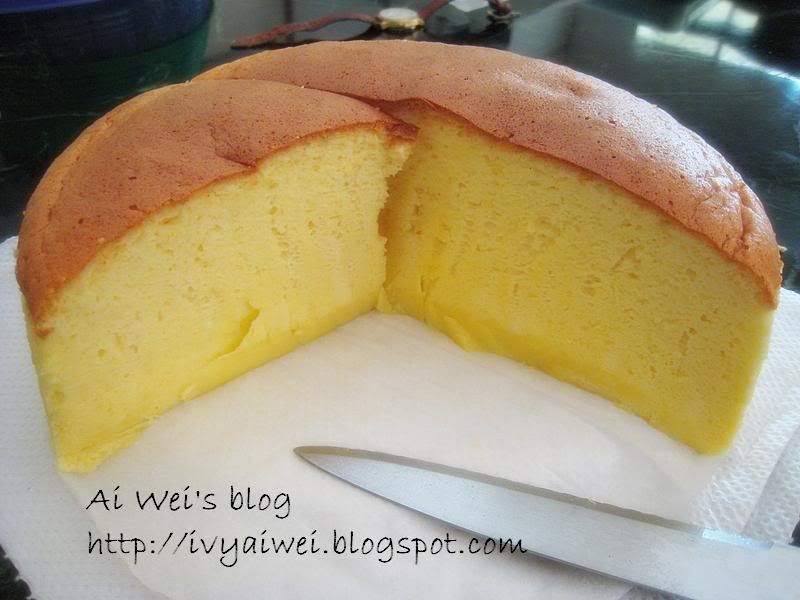
The Cottony Cheese Cake looks so good in the round pan. I was really happy with the round pan my mum bought. This cake was freshly baked in this evening and guess what?! We have wholloped half and left the remaining half for breakfast tomorrow!


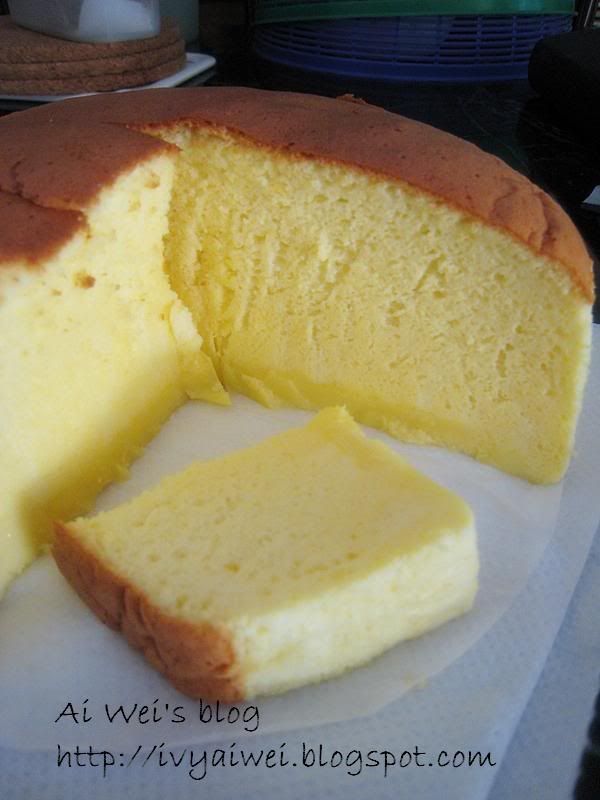
Due to the lack of lemon juice, I substituted it with 3 big table spoons of orange juice. It turned out soft, fluffy and tasty as well!


Each bite just melts right in your mouth!


For the cottony cheese cake lover, do try a hand on this adapted recipe (here). it is very easy to follow and bake ~

.

Monday, November 12, 2007

Japanese Cottony Cheese Cake

It’s my time to bake again.

The weather was cool and it rained for the whole Saturday morning. I was supposed to wake up at 7am and prepared all the ingredients for baking so I could have cakes for breakfast. Ended up, I was late for 3 hours. Still, I managed to have them as dessert after lunch!


I have been longing to bake this when I read through Precious Moments and Little Corner of Mine. The Japanese Cottony Cheese Cake looks so Yummy from 2 of the blogs. I did all alone in the beginning. Then second brother showed interest and gave me a helping hand while I was measuring the ingredients and separating the egg whites and yolks. He helped me out in mixing them. What a kind bro he is. (Ish… cannot praise him too much.)

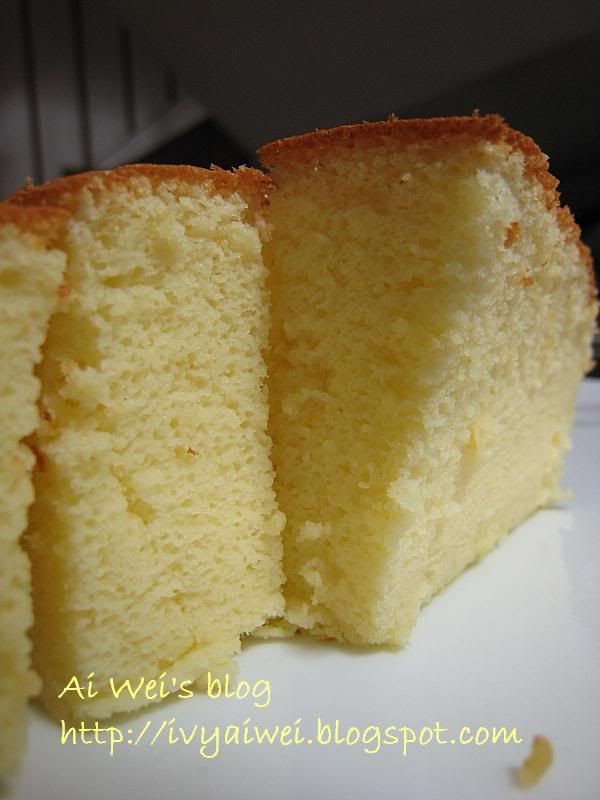
It was cottony, neither too sweet nor heavy and simply light. Maybe you will see that the texture is quite ‘rough’ from the slices but I can tell you, NO. They were soft and very fluffy. Just melt once in your mouth. I should have the cake sliced when it was really cool but I got a bit impatient and sliced the cake while it was still warm. A little imperfection is that I used a square pan instead of round pan. So, could not get a really nice pic of the square-shaped cake. I will get myself a round pan and post up the nice round cake picture soon. *coming soon*~

Besides, I brought 1/3 of the Japanese Cottony Cheese Cake over my aunt’s house and her kids simply love this. And yes, we finished the whole cake in just one day.

Point: Japanese Cottony Cheese Cake tastes good too after chilling.


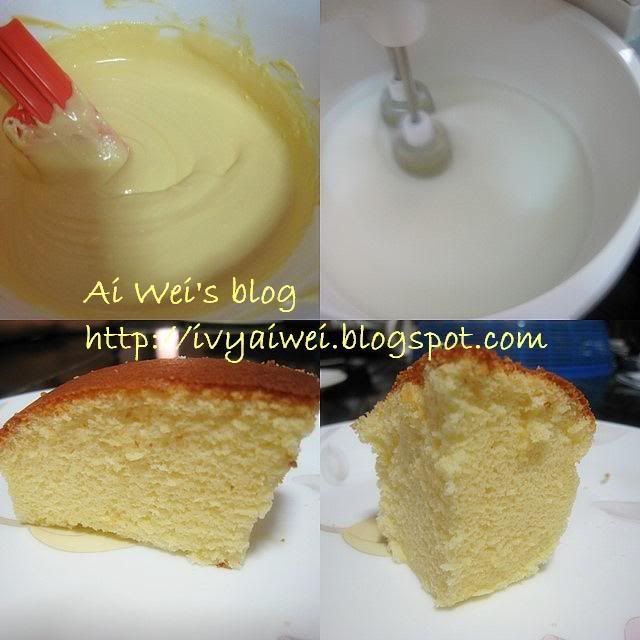
Upper left: after I mixed up both (A) and (B)
Upper right: mixture for (C)
Lower left and right: the fluffy cottony cake

The adapted recipe:

Part A:
250g Philadephia Cream Cheese
50g Butter
100ml Fresh Milk


Part B:
60g Superfine Flour (top or cake flor)
20g Cornflour
6 Egg Yolks
1 tbsp Lemon Juice
¼ tsp Salt


Part C:
6 Egg Whites
¼ tsp Cream of Tartar
140g Fine Granulated Sugar


Melt (A) in double boiler and cool the mixture until room temperature.

Fold in (B) and mix well

Whisk egg whites with cream of tartar until foamy and then add in sugar and whisk until soft peaks form. Fold in half of the (C) into the mixture and mix well. Then add in the other half and mix them evenly.

Pour the mixture in 8 inches round cake pan (lightly grease and line the bottom and side of the pan with greaseproof paper).

Finally, bake in water bath for 1 hour 10 minutes or until set or golden brown at 160 °C.


Try it out and enjoy~

Tuesday, September 25, 2007

Caramelized Almond Crisp?!


I guess that’s the name for this? Mum and I were searching for almond crisp recipe for quite a long time. We love almond crisp a lot and we could only have it during Chinese New Year. Weird… almond crisp only on sale during CNY and the price is always a boom. My aunt who fancies this keeps bugging us to find out the recipe and make some for her.

So one day while mum and I were shopping in the cake ingredient shop, we saw the packets of icy white silky powder on the rack. BIENETTA (it stated in German). 200 g of bienetta + 300g of almond slice, line thin and bake. Looks simple. Hmmm, maybe that’s the almond crisp we were looking for?!

The end products~


Well, it was more like the Caramelized almond crisp than the almond crisps its own. Slightly sweet and crunchy, I like it. However, the bienetta (powder) is quite costly. Gonna take more efforts to find out the real recipe for almond crisp! ~

By the way, anyone knows what’s Bienetta?

Sunday, August 26, 2007

Homemade Chocolate Chips Walnut Muffin

It has been a long time since my last ‘baking’ because my house undergoes a little small tiny renovation which kept me busy in--- cleaning the house and doing household chores (which included vacuum, mopping, lap here and there….) I was really tired with it as I had the same routine (as above) for 2 weeks. *haih*

So, yesterday afternoon, I was in the kitchen without the assistant from mummy but the disturbance from my youngest brother. He wanted to help me by adding the ingredients. For me, he was really disturbing. Still, I managed to come out with 15 chocolate chips walnut muffins. *hehehe*


Ingredients like walnut, chocolate chips, muffin mix, corn oil, water, eggs are a must. (only parts of the ingredients shown as above)

Firstly, I baked the walnut and left it to be cooled. Meanwhile, I beat the eggs and added in the muffin mix and water little by little and stirred gently. Next, Corn oil was added and well mixed. You could add in chocolate chips and walnuts as many as you wish before sending them into the oven. Finally, placed about 4/5 full of the mixture into the cup moulds (with paper cups) and sent them into the oven. I baked them at 180 degree for 20minutes.

In the oven~

The chocolate chips walnut muffins, wanna have some?!


These are best served with coffee/ tea/ milk~

Friday, July 06, 2007

Blueberry Cheese Tart

I made it! I made it! I made it! Anyone wants?!

*Happy*

For the whole afternoon, I was experimenting and playing with this new recipe which I got from a Chinese newspaper. I have bought the ingredients in mid of last month and finally I have time for this new recipe. I have made about 12 pieces and the ingredients were cost less than Rm12 while out there selling Rm2 to 2.30 per piece.


Before removing the tarts from the mould.


I was a bit greedy. I have put a bit too much of the cream cheese mixture into each tart base. There seemed to have bit over filling. Next time I will reduce the filling for each and this means that I can make more tarts with the extra fillings.

I love this. It tasted so cheesy and the base and fillings were cooked just nice.

Recipe for blueberry cheese tart
Ingredients:


Tart base:
Flour 180g
Milk powder 15g
Castor sugar 30g
Butter 100g
Egg 1

Tart fillings A:
Cream cheese 250g
Castor sugar 60g
Butter 25g

Tart fillings B:
Lemon essence few drops
Blueberry filling sauce few

Steps:
1. Firstly, beat the tart base’s ingredients smoothly into dough.
2. Then separate them into small portions and place inside the moulds according to the shape of the moulds.
3. Next, use a fork to poke all over the base and send them into the oven. Bake at 150 °C for 10minutes.
4. beat the ingredients Tart fillings A into fluffy and smooth. Then add in a few drops of lemon essence.
5. Place the filling into each tart base at about 90% full. Add on a little Blueberry filling sauce. Use a toothpick to mix up the blueberry and the cream cheese. You may make some drawing as well.
6. Lastly, place the tart into the oven again and bake at 180 °C for 15minutes.

Related Posts Plugin for WordPress, Blogger...